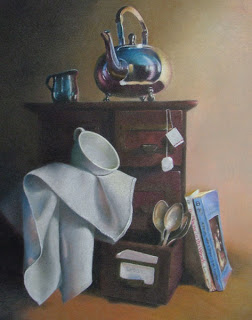
 Here's where I'm at. The photo is a bit skewed from not taking the photo completely straight on, so some of the lines are a bit off. I will be doing a few more little things to this like altering colors and other nitpicks, but it is pretty much finished.
I thought I would show you some step-by-steps from this starting with some steps on the fabric.


Steps for the Fabric:
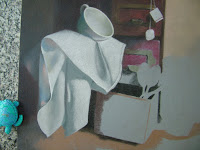
In the first image I've already done the left side of the fabric to a higher degree than the right, so I will be focusing on the right side of the fabric in this wip. With the cloth I've essentially made a monochromatic underpainting, to which I applied colors on top of in the last step.
I'll post the steps for the wood drawers later. :)
- On the right side, I've blocked in, very generally, the "colors" of the fabric: derwent coloursoft white grey for lighter bits, and steel grey for the medium areas of grey. Then I did put a darker grey in a few spots.
- I didn't do anything to the cloth in the second image.
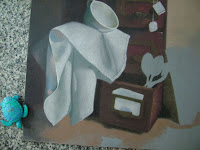
- In the 3rd image, I took a color that landed in between white grey and steel grey (dove grey) and glazed it over pretty much everything to make smooth transitions between the lighter/darker areas.
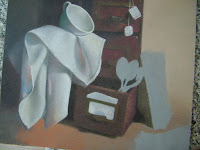
- In the 4th image I've added color (dusty blues and dusty peaches) and added them over the top of the grey "underpainting" I've created. I've also used white and darker colors to add more highlights and darks. This step took quite a while and is not just a simple glazing of colors over a finished drawing. Sometimes you have to readjust values after this.

5 comments:
Nicole,
gorgeous work!
I do have two questions (or three) I wanted to ask:
Does the sanded support you use eat away the colored pencils really fast?
And exactly what is "glazing" with colored pencils? how do you do it?
And third but not least:
Do you use a solvent to blend in the colors, or just lots and lots of layers?
I'm a newbie to CPs and absolutely adore your work, so I got really curious about it.
Once again, can't wait to see what's coming next!
Hi Jay!!
Yep the ough support does eat the pencils quickly, but its so much fun to work on its worth it!
Glazing - its when put a light even layer over other layers to smooth things out or to tint a section.
Nope no solvent - but you don't need loads of layers to get it to blend - they blend easily. The trick is to blend with softer pencils - you may have noticed that for the most part the darker colors aren't as soft and the medium and lighter colors are. As long as you you use a nice reamy color it blends quickly without a lot of layers.
Thanks Jay!!
Broad subject matter and textures. You are an impresario of the still life subject!
Oohhh, thank you so much for that info!!
Sweet!
I love the paper, wood, cloth, metal, and ceramic and how it is all integrated.
I like how the “scene” is kinda harried yet with a few quick movements one could put it all back in order. Fold the linen, put the spoons and cup away and do something with the tea bags. I do wonder if it is so harried that the tea bags are used.
Post a Comment